On Exchange Server 2013
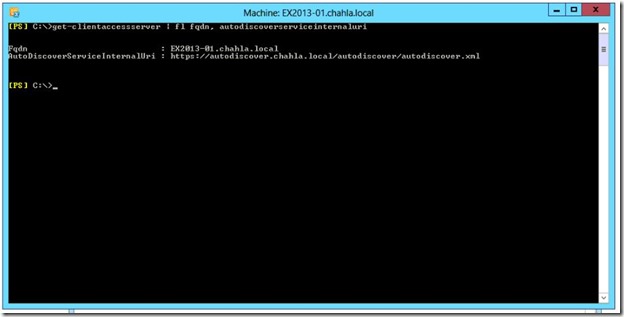
Get the Autodiscover URI using this comand in Exchange Management Shell:
Get-ClientAccessServer | fl fqdn, AutodiscoverServiceInternalURI
You can set the Autodiscover URI using this command:
Get-ClientAccessServer | Set-ClientAccessServer -AutoDiscoverServiceInternalUri "https://autodiscover.chahla.local/autodiscover/autodiscover.xml"
In my Case: https://autodiscover.chahla.local/autodiscover/autodiscover.xml
On Lync Server 2013
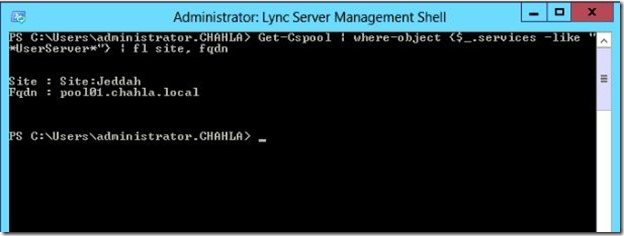
Get the Site name and the Pool FQDN using this comand in Lync Management Shell:
Get-Cspool | where-object {$_.services –like “*UserServer*”} | fl site, fqdn
In my Case: Site is Jeddah and Pool FQDN is Pool01.chahla.local
Now we need to access Autodiscover and the Pool from both servers (Exchange & Lync) thru a browser and make sure that we don’t have any certificate issues or warnings.
From Exchange Server: type the URL then enter your credentials.

it should look like this, notice that there is no certificate warnings.

- The same for pool01.
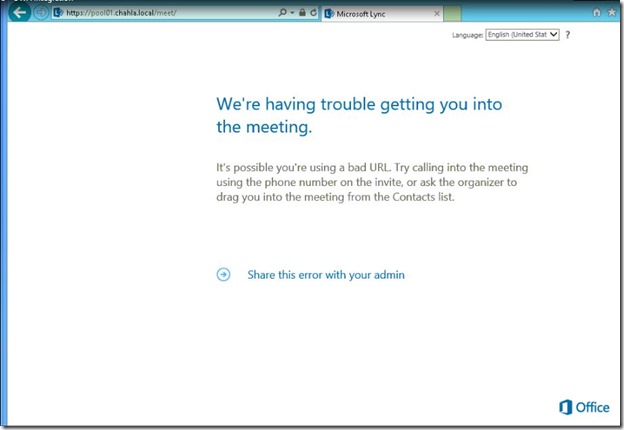
From Lync Server: type the URL then enter your credentials.
Back to Exchange Server:
Configuring an On-Premises Partner Application for Microsoft Lync Server 2013
Type the below commands in Exchange Management Shell:
cd $exscripts
.\Configure-EnterprisePartnerApplication.ps1 -AuthMetadataUrl "https://pool01.chahla.local/metadata/json/1" -ApplicationType Lync
make sure you put your pool fqdn.
Source: http://technet.microsoft.com/en-us/library/jj204975.aspx

then do an iisreset

Determine the Certificate Thumbprint
Get-ExchangeCertificate | where-object {$_.services -like "*iis*" } | fl subject, issuer, services, thumbprint
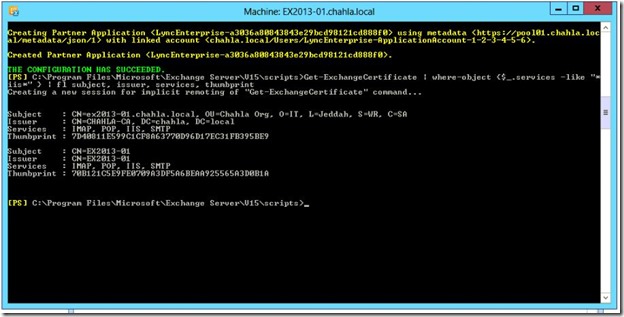
My Certificate thumbprint 7D40811E599C1CF8A63770D96D17EC31FB395BE9

Now assign the pool name and the certificate thumbprint to OWAVirtualDirectory
Get-OwaVirtualDirectory -ShowBackEndVirtualDirectories -server ex2013-01.chahla.local | where { $_.WebSite -eq `Exchange Back End' } | Set-OwaVirtualDirectory -InstantMessagingEnabled $true -InstantMessagingType OCS -InstantMessagingCertificateThumbprint 7D40811E599C1CF8A63770D96D17EC31FB395BE9 -InstantMessagingServerName pool01.chahla.local

Get-OwaMailboxPolicy | Set-OwaMailboxPolicy -InstantMessagingEnabled $true -InstantMessagingType OCS
Source: http://technet.microsoft.com/en-us/library/jj688055.aspx
Now we need to edit web.config file of OWA
Open
C:\Program Files\Microsoft\Exchange Server\V15\ClientAccess\Owa
Edit web.config with Notepad
Add the below two keys in the <appSettings> part
<add key="IMCertificateThumbprint" value="7D40811E599C1CF8A63770D96D17EC31FB395BE9" />
<add key="IMServerName" value="pool01.chahla.local" />

substitute your thumbprint and pool fqdn.
Then recycle the IIS pool, using this command
C:\Windows\System32\Inetsrv\Appcmd.exe recycle apppool /apppool.name:"MSExchangeOWAAppPool"

Finished from Exchange Server part, now on Lync Server.
We need to create a Partner Application, Trusted Application Pool and a Trusted Application.
Partner Application:
New-CsPartnerApplication -identity Exchange -ApplicationTrustLevel Full -MetadataUrl https://autodiscover.chahla.local/autodiscover/metadata/json/1

Trusted Application Pool:
New-CsTrustedApplicationPool -Identity ex2013-01.chahla.local -Registrar pool01.chahla.local -Site Jeddah -RequiresReplication $False
Source: http://technet.microsoft.com/en-us/library/jj688055.aspx

Trusted Application:
New-CsTrustedApplication -ApplicationId OutlookWebAccess -TrustedApplicationPoolFqdn ex2013-01.chahla.local -Port 5199

Then, Enable-Cstopology for the settings to be published.

And we are finished, now we can test it by signing in to OWA and then Sign in to IM from inside OWA.
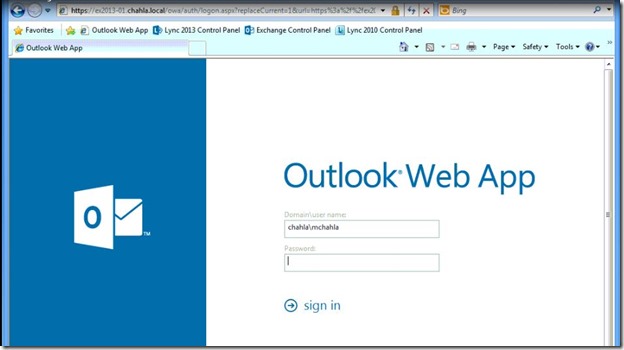
- Sign in to IM.


- Looks nice.

Test IM from another user


1 New message pops up, accept and start the chat session.


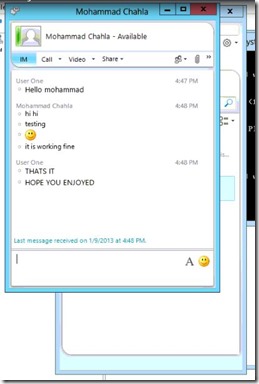
Done.
Get the Autodiscover URI using this comand in Exchange Management Shell:
Get-ClientAccessServer | fl fqdn, AutodiscoverServiceInternalURI
You can set the Autodiscover URI using this command:
Get-ClientAccessServer | Set-ClientAccessServer -AutoDiscoverServiceInternalUri "https://autodiscover.chahla.local/autodiscover/autodiscover.xml"
In my Case: https://autodiscover.chahla.local/autodiscover/autodiscover.xml

On Lync Server 2013
Get the Site name and the Pool FQDN using this comand in Lync Management Shell:
Get-Cspool | where-object {$_.services –like “*UserServer*”} | fl site, fqdn
In my Case: Site is Jeddah and Pool FQDN is Pool01.chahla.local

Now we need to access Autodiscover and the Pool from both servers (Exchange & Lync) thru a browser and make sure that we don’t have any certificate issues or warnings.
From Exchange Server: type the URL then enter your credentials.

it should look like this, notice that there is no certificate warnings.

- The same for pool01.

From Lync Server: type the URL then enter your credentials.
Back to Exchange Server:
Configuring an On-Premises Partner Application for Microsoft Lync Server 2013
Type the below commands in Exchange Management Shell:
cd $exscripts
.\Configure-EnterprisePartnerApplication.ps1 -AuthMetadataUrl "https://pool01.chahla.local/metadata/json/1" -ApplicationType Lync
make sure you put your pool fqdn.
Source: http://technet.microsoft.com/en-us/library/jj204975.aspx

then do an iisreset

Determine the Certificate Thumbprint
Get-ExchangeCertificate | where-object {$_.services -like "*iis*" } | fl subject, issuer, services, thumbprint

My Certificate thumbprint 7D40811E599C1CF8A63770D96D17EC31FB395BE9

Now assign the pool name and the certificate thumbprint to OWAVirtualDirectory
Get-OwaVirtualDirectory -ShowBackEndVirtualDirectories -server ex2013-01.chahla.local | where { $_.WebSite -eq `Exchange Back End' } | Set-OwaVirtualDirectory -InstantMessagingEnabled $true -InstantMessagingType OCS -InstantMessagingCertificateThumbprint 7D40811E599C1CF8A63770D96D17EC31FB395BE9 -InstantMessagingServerName pool01.chahla.local

Get-OwaMailboxPolicy | Set-OwaMailboxPolicy -InstantMessagingEnabled $true -InstantMessagingType OCS
Source: http://technet.microsoft.com/en-us/library/jj688055.aspx
Now we need to edit web.config file of OWA
Open
C:\Program Files\Microsoft\Exchange Server\V15\ClientAccess\Owa
Edit web.config with Notepad
Add the below two keys in the <appSettings> part
<add key="IMCertificateThumbprint" value="7D40811E599C1CF8A63770D96D17EC31FB395BE9" />
<add key="IMServerName" value="pool01.chahla.local" />

substitute your thumbprint and pool fqdn.
Then recycle the IIS pool, using this command
C:\Windows\System32\Inetsrv\Appcmd.exe recycle apppool /apppool.name:"MSExchangeOWAAppPool"

Finished from Exchange Server part, now on Lync Server.
We need to create a Partner Application, Trusted Application Pool and a Trusted Application.
Partner Application:
New-CsPartnerApplication -identity Exchange -ApplicationTrustLevel Full -MetadataUrl https://autodiscover.chahla.local/autodiscover/metadata/json/1

Trusted Application Pool:
New-CsTrustedApplicationPool -Identity ex2013-01.chahla.local -Registrar pool01.chahla.local -Site Jeddah -RequiresReplication $False
Source: http://technet.microsoft.com/en-us/library/jj688055.aspx

Trusted Application:
New-CsTrustedApplication -ApplicationId OutlookWebAccess -TrustedApplicationPoolFqdn ex2013-01.chahla.local -Port 5199

Then, Enable-Cstopology for the settings to be published.

And we are finished, now we can test it by signing in to OWA and then Sign in to IM from inside OWA.

- Sign in to IM.


- Looks nice.

Test IM from another user


1 New message pops up, accept and start the chat session.


Done.


